
Make a cute ocean-themed amigurumi, with this easy and free Seahorse Crochet Pattern. As part of the Jelly Bean collection, this easy-to-follow pattern is No-Sew and comes with helpful photos and full video tutorial – for the sea horse and individual amigurumi steps!
There’s no denying the cuteness of a little seahorse. They’ve captivated humans throughout history. And now you can craft your own majestic little sea creature, with the easy Jelly Bean Seahorse crochet pattern!
Even if you’re new to crochet, don’t be intimidated by amigurumi plush dolls! Darling Maple Designs is your one stop shop for easy amigurumi crochet patterns for all kinds of stuffed animals. This free pattern is designed for beginners and uses only basic crochet stitches. You can learn amigurumi and make this sweet seahorse for personal use, to add to a craft table, or to gift to someone you love!
What Makes this Seahorse Crochet Pattern Easy for Beginners?
- Simple Stitches: This pattern uses only basic crochet stitches like single crochets, increases, and decreases – perfect for those new to the craft!
- No-Sew Construction: Skip the needle and thread! This pattern uses clever techniques to create a finished amigurumi without any sewing required.
- Continuous Crocheting: No need to worry about joining rounds or sewing pieces on. This pattern allows for a smooth crocheting experience.
- Manageable Size: The finished seahorse is the perfect size for a keychain, desk buddy, or small plushie, making it a quick and rewarding project.
- Clear Instructions: With detailed written instructions, photos and a helpful video tutorial, you’ll have all the guidance you need to create your adorable seahorse.
Fun and Functional Ideas for Your Seahorse Amigurumi
This seahorse crochet pattern is so versatile, it can transform into more than just a cuddly plushie friend! Here’s some fun suggestions.
- Hide a rattle or noisemaker inside before stuffing.
- String a collection of these seahorses on a thread to create a mesmerizing mobile that will gently sway and soothe a nursery, or a vibrant garland to adorn an under-the-sea themed bedroom.
- Stuff your seahorse with stress beads for a fidget toy that’s both cute and calming! This pattern offers endless possibilities to get creative and craft something truly special.
This Crochet Seahorse Pattern also includes a Full Video Tutorial!
Don’t want to wait for the rest of the Jelly Bean Sea Creatures to be released on the blog?!
The rest of the Jelly Bean Ocean Animal Collection, will be making their appearance on the blog over the next couple months. In the meantime, if you’re wanting to get started on the rest of the Jelly Bean 7 Sea Creature Crochet Pattern Bundle, it’s ready to go!
All this cuteness is available NOW, in the Jelly Bean 7 Sea Creature Crochet Pattern e-book! This crochet pattern collection includes instructions to create the sea turtle, octopus, seahorse, squid, angelfish, goldfish, and crab !

Want to stay up to date on all the Darling Maple Designs happenings? Be sure to subscribe to my newsletter ![]()
Thank you so much for being here and crocheting with me ![]()
Please share your work by tagging me on FB or IG @darlingmapledesigns or use #darlingmapledesigns for a chance to have your work featured in my IG stories! ![]() Sara
Sara
If you love the crochet Seahorse pattern? You’ll simply adore my ‘Jelly Bean’ Goldfish and Angelfish crochet patterns, – which are free amigurumi patterns too!
No-Sew ‘Jelly Bean’ Crochet Goldfish Amigurumi
No-Sec ‘Jelly Bean’ Crochet Angelfish Amigurumi

Interested in more cute crochet patterns? Check these out!
The Premium PDF version of this pattern in now available and includes a convenient printable format, plus lots additional photos.
What you will need to make your No Sew Jelly Bean Seahorse Crochet Pattern
[A detailed, step-by-step pattern with clearly written instructions and easy to follow video tutorial]
Materials:
Hook size 5.0 mm (H)
Yarn – Hobbii Honey Bunny
| Yarn – Light Super Bulky (6)- Hobbii Honey Bunny or Premier Parfait Chunky | ||
| Main Colour: Yellow | 20 yards | |
| Accent Colour: Turquoise | 10 yards | |
| Optional Accent Colours: White medium worsted weight | small amount | |
- Polyester filling – small amount
- 2 – 10mm black safety eyes (not suitable for children under 3): See video for embroidering eyes as an alternative.
- Stitch Markers or Safety pins to help with sewing placement
- Yarn needle to weave in the ends
Gauge: 4 Rounds of Gauge Pattern = 2.0 inch diameter
Gauge Pattern: Create a Magic Ring
Round 1: 6sc in the ring (6)
Round 2: 2sc in each st (12)
Round 3: *sc, 2sc* 6 times (18)
Round 4: *sc in the next 2 sts, 2sc* 6 times (24)

All of these Materials can be found in my Amazon Storefront shops
Abbreviations:
| ch | chain |
| sc | single crochet |
| scdec | single crochet decrease |
| sk | skip |
| ss | slip stitch |
| st(s) | stich(es) |
| trc | treble (triple) crochet |
| *to* | repeat the sequence between the ** the number of times indicated |
| YO | Yarn Over |
Special Stitches & Techniques:
Full Video Tutorial
Magic ring
Crocheting on the snout
Embroider Eyes
Eye Highlights
Treble (Triple) Crochet – YO twice, insert hook, YO, pull up loop, *YO pull through 2 loops* twice
Notes:
- #sc, eg. (2sc, 3sc, etc) shows the number of scs to be completed in the indicated st
- Sts listed between brackets are all worked in the same st, eg. (hdc, dc)
- I highly recommend using a stitch marker to help keep track of the rounds for the body/head
Recommended Sequence: It is highly recommended to complete the Jelly Bean Seahorse in the order written.
Start your Jelly Bean Seahorse Crochet Pattern:
Snout:
The snout is worked in continuous rounds starting from the tip. The snout will be crocheted into the Head/Body.
Using Main Colour, create a Magic Ring
Round 1: 6sc in the ring (6)
Round 2: sc in each st (6)
Round 3: *sc, scdec* twice (4)
Round 4: *sc, 2sc* twice (6)
End off, leaving a 6 inch tail. Mark the last 3 worked sts (these will be the ‘back’ sts) to help with crocheting the snout into the head.
Body/Head: The body and head are worked in one piece from the bottom up in continuous rounds.
Using Main Colour, create a Magic Ring
Round 1: 6sc in the ring (6)
Rounds 2-11: sc in each st (6)
Round 12: *2sc* 6 times (12)
Round 13: *sc in the next 3 sts, 2sc* 3 times (15)
Rounds 14-17: sc in each st (15)
Round 18: *sc in the next 3 sts, scdec* 3 times (12)
Stuff the body section, leaving the ‘tail’ portion unstuffed
Round 19: *scdec* 6 times (6)
Round 20: *2sc* 6 times (12)
Round 21: *sc, 2sc* 6 times (18)
Round 22: sc in each st (18)
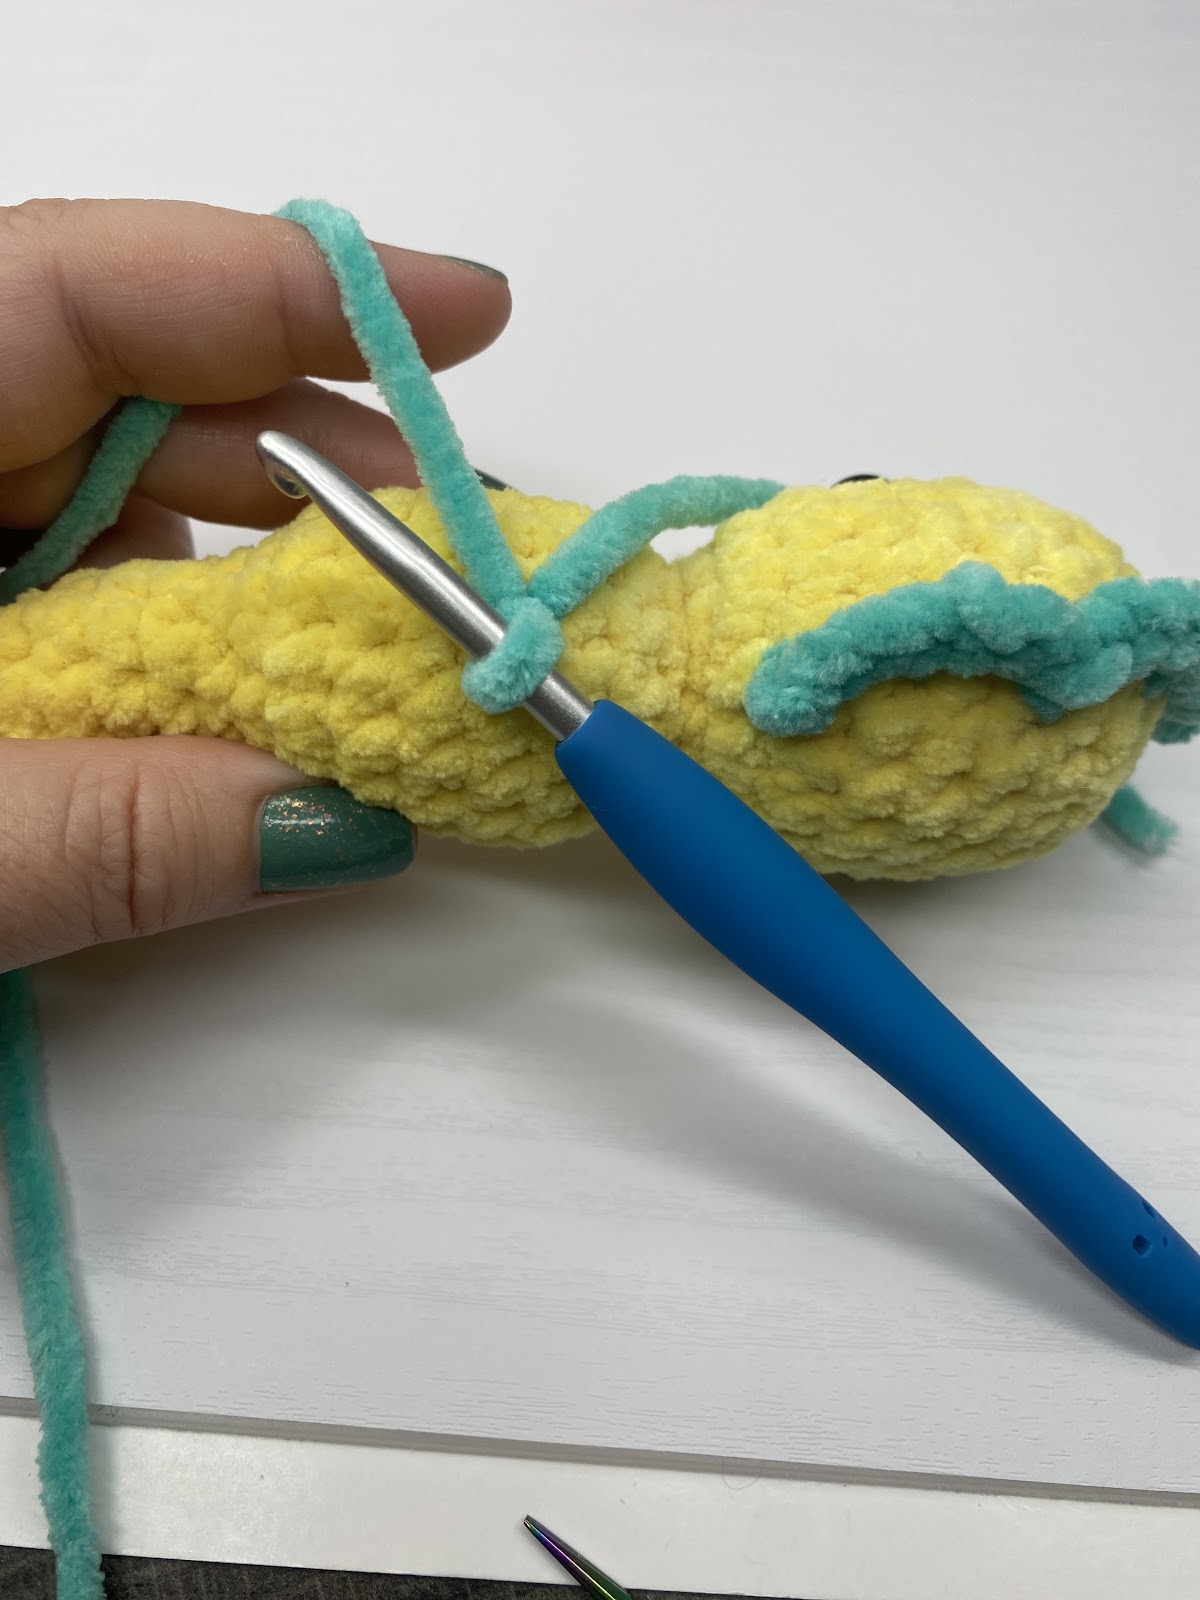
| Round 23: Sc in the next 7 sts, hold your snout in front of your work, flatten the top to find the ‘front 3’ and ‘back 3’ sts (marked sts). Beginning in the ‘back (marked) st’ closest to the right (left if left handed), working through both the Snout (inserting the hook from the inside of the st to the outside) and Body (in the same direction as previous round), sc in the next 3 sts, working through the body only, sc in the next 8 sts (18) | |
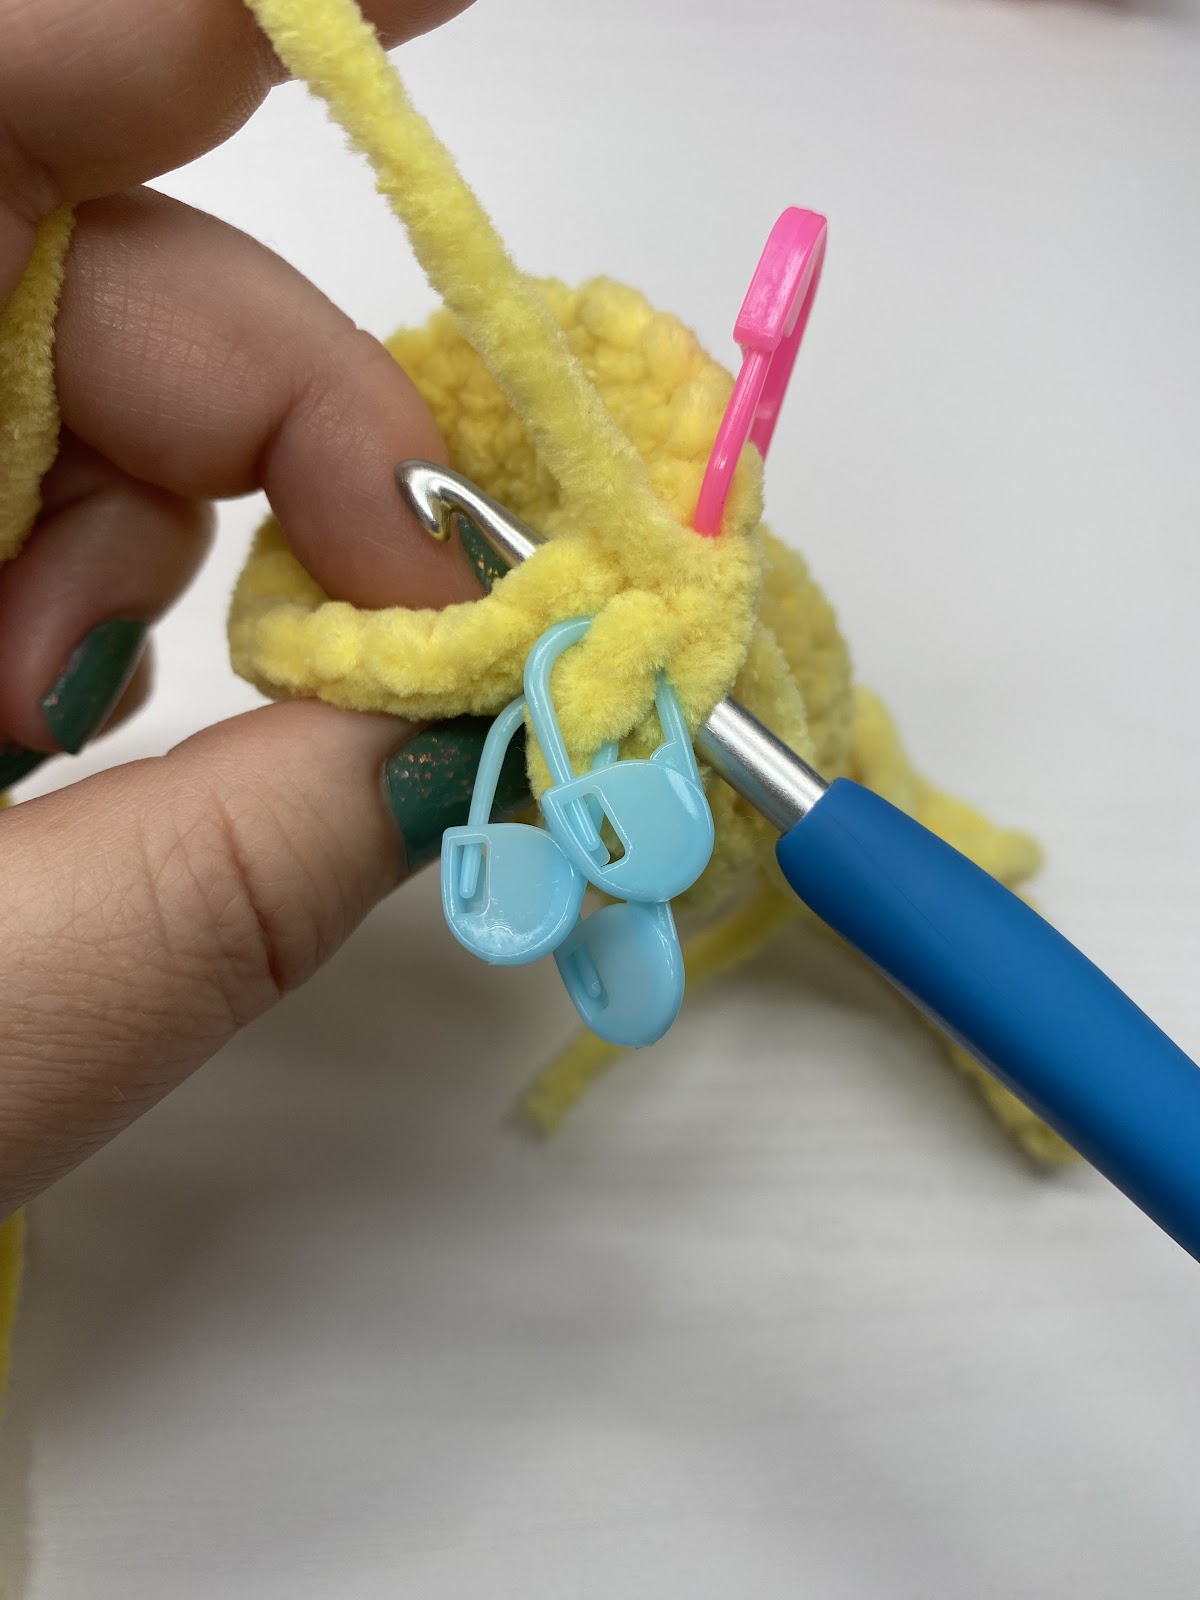 |
| Round 24:. Sc in the next 7 sts, working through the ‘front sts’ of the snout only, sc in the next 3 sts (skip the 3 sts connecting the back sts of the snout to the body), working through the body only, sc in the next 8 sts (18). | |
 |
Round 25-27: sc in each st (18)
| Adding Eyes/Sew up holes on sides of the snout: If using safety eyes, place on Round 24 of the head, approx 8-9 sts apart. Using the tail of the snout, sew up the little holes made on either side of the snout from crocheting it on. | |
 |
Round 28: *sc, scdec* 6 times (12)
Stuff the head
Round 29: *scdec* 6 times (6)
Finish stuffing
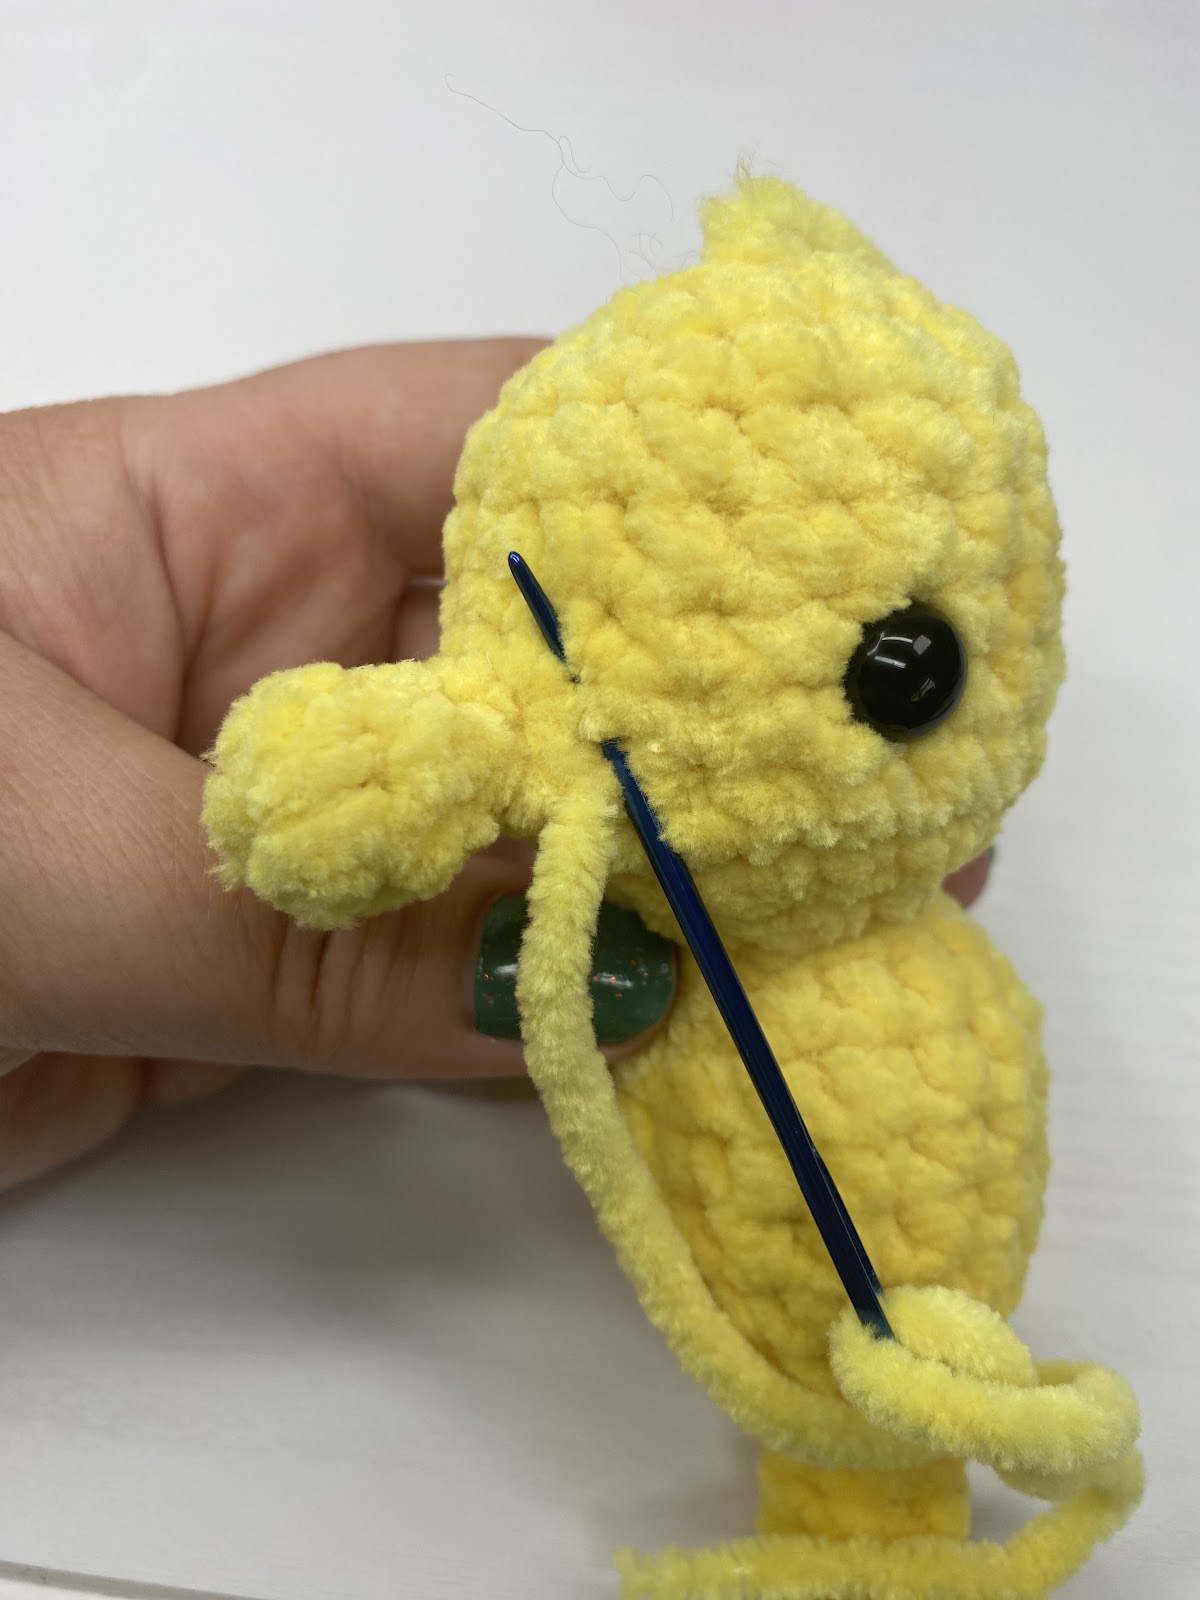
End off leaving a 6 inch tail, cinch the last 6 sts together and weave in the end.
Head Fin:
The Head Fin is worked down the back centre of the head in 1 row.
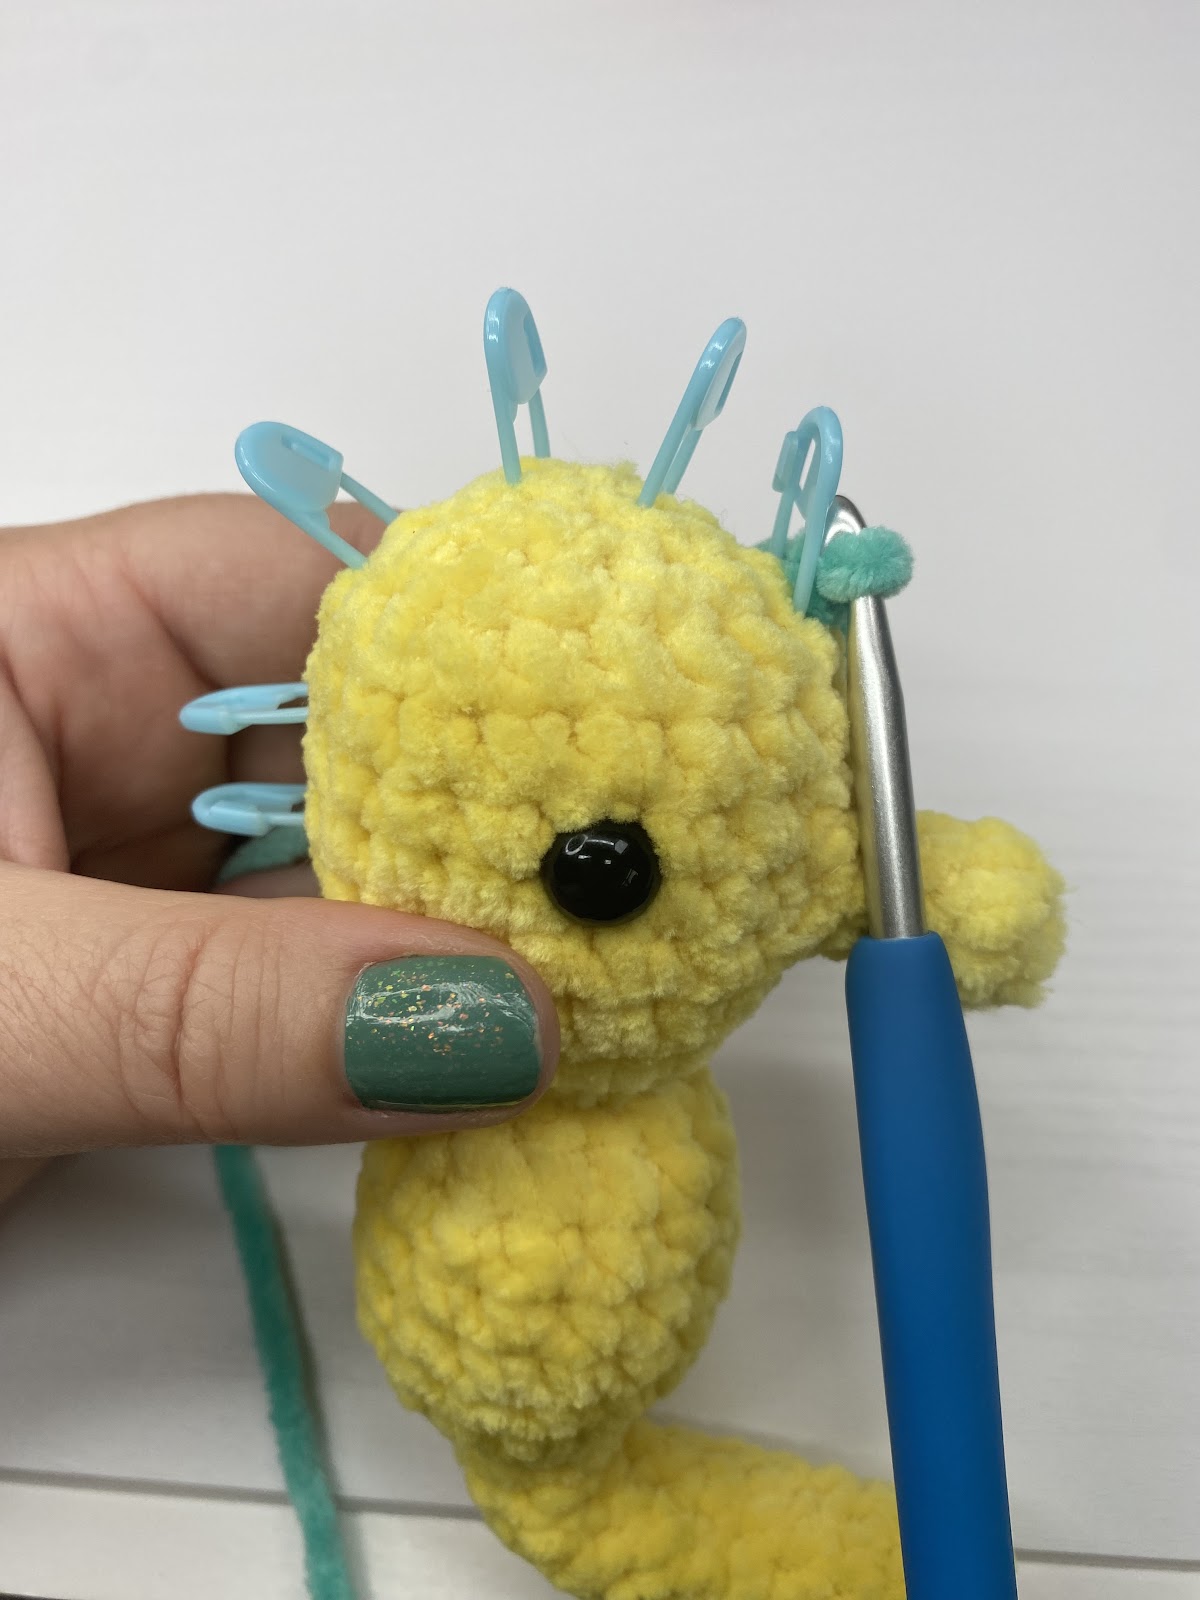
| Place a stitch marker on Round 27 of the head in between the eyes. Place an additional stitch marker every 2 rounds up and back down the centre of the head until you reach the back bottom of the head (approx. 7 stitch markers). Using accent colour, attach yarn to the first stitch marker. Sc in the first marked st, *ch3, sc* in each marked stitch. End off, weave in ends. | |
 |
Dorsal Fin:
The Dorsal Fin is worked in the centre of the back.
| Attach yarn to a stitch at the centre back of Round 16 of the body. (ch3, 3trc, ch3, ss).End off, weave in ends | |
 |
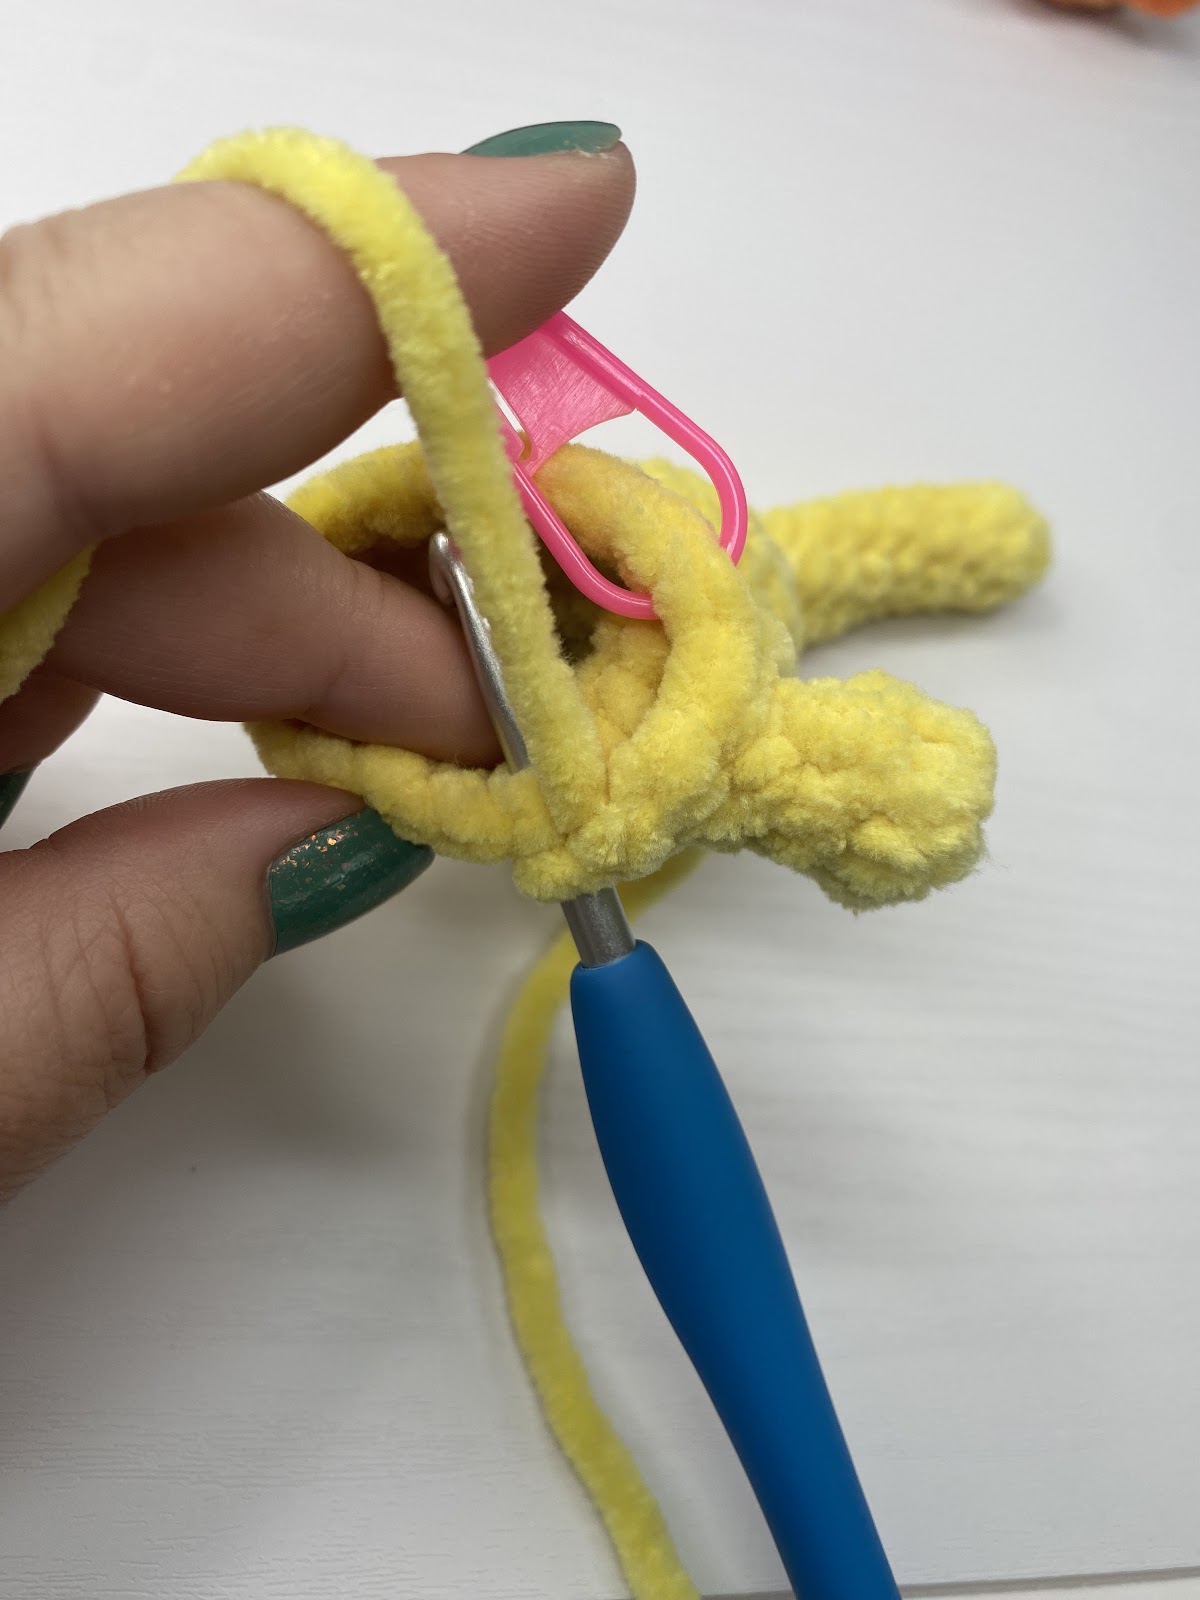
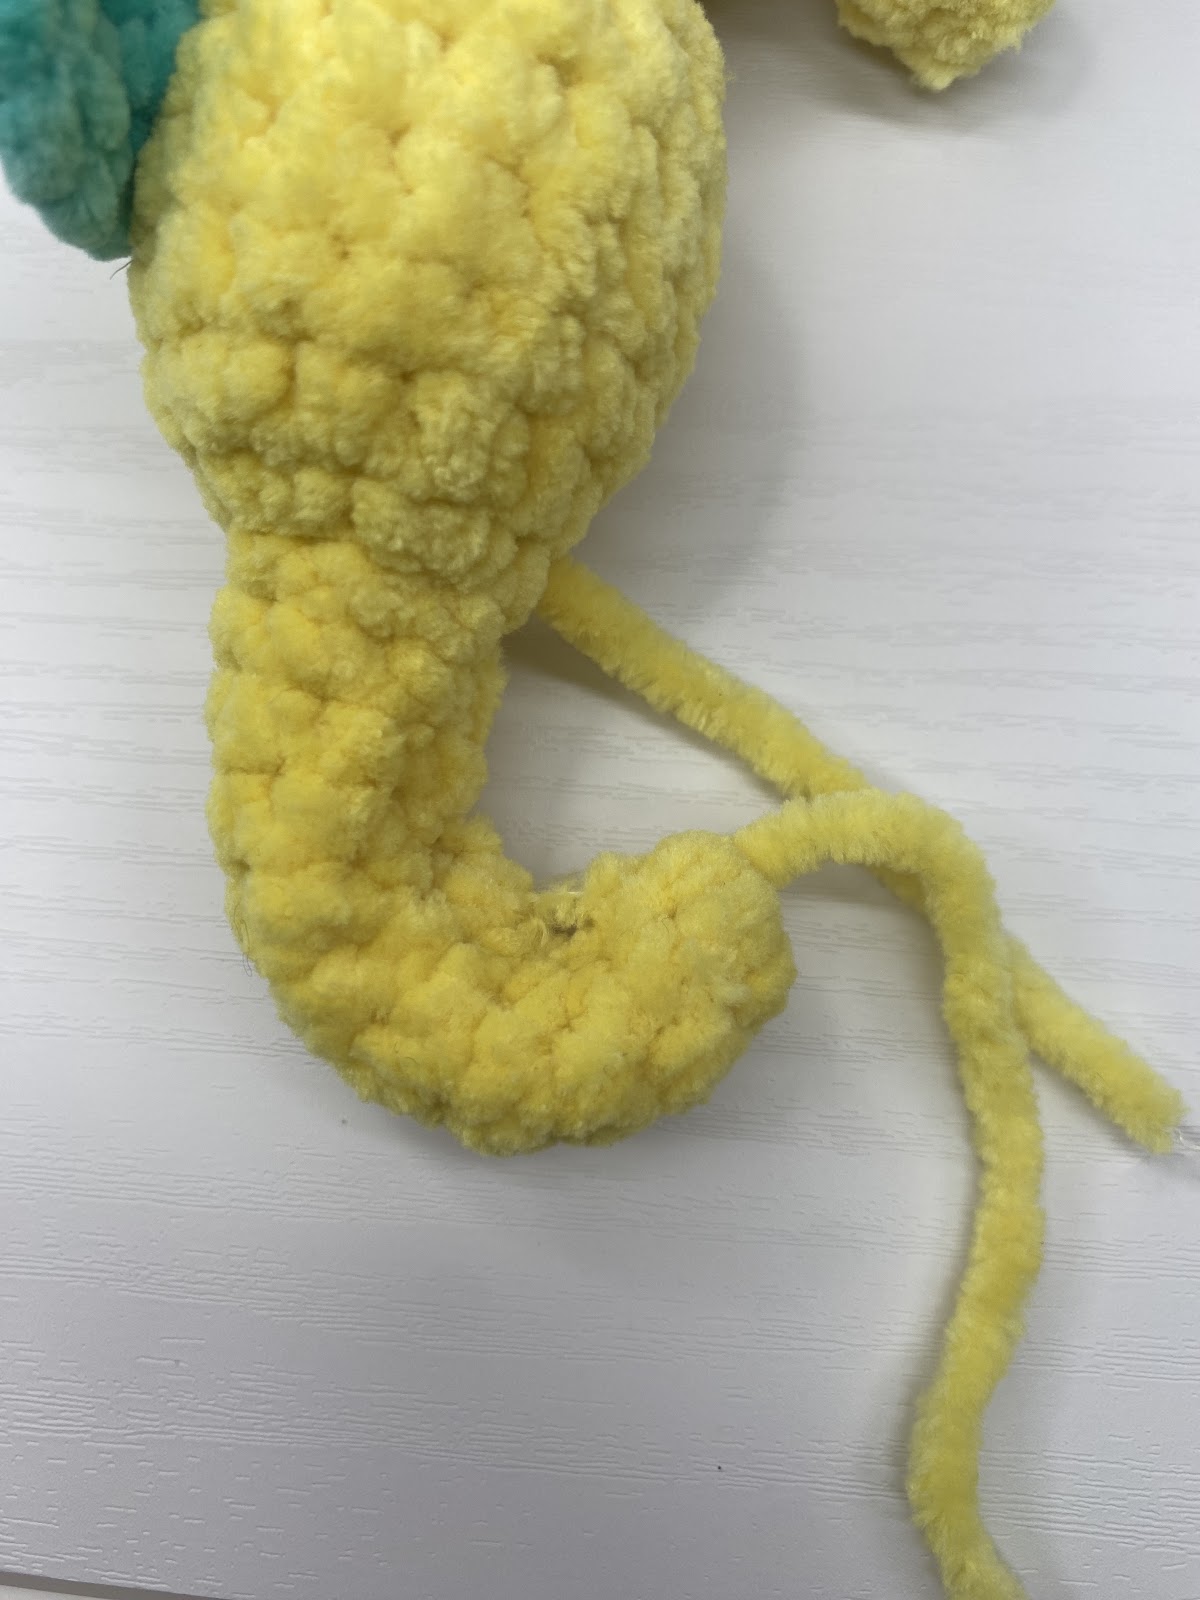
Sewing up the Tail:
| With a 12” scrap piece of yarn (main colour), sew through the front centre of every 3-4 rounds until reaching Round 12 of the body. Pull the yarn tight to curl up the tail, secure with a knot and weave in ends. | |
 |
Sewing Placement –
| Eye Details: Follow video for optional eye detail. Video: | 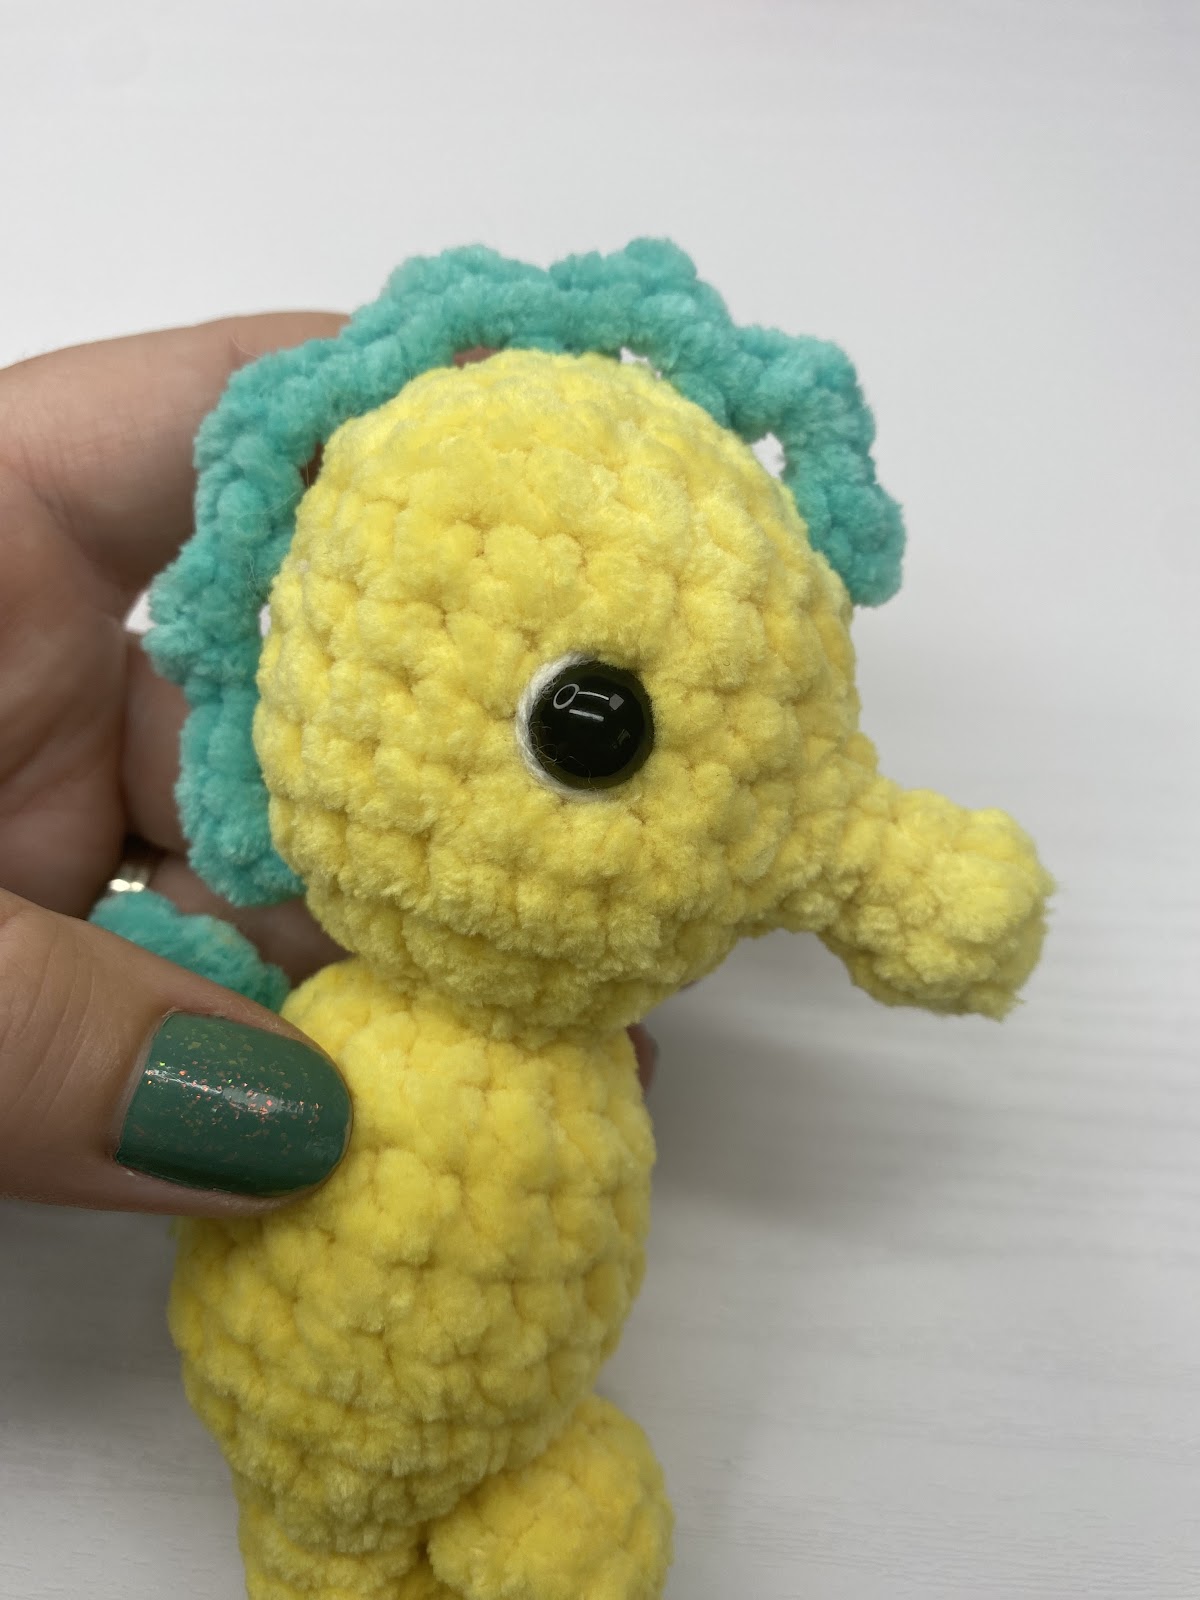 |
We love seeing your finished projects. Tag us in your photos and posts using #DarlingMapleDesigns or @DarlingMapledesigns.
Congratulations!
You have now completed your No-Sew Jelly Bean Seahorse Amigurumi: Free Crochet Pattern.
If you’re feeling hooked? (pun intended!) This blog post has a collection of free no-sew amigurumi patterns to inspire your next project!
Easy, NO-SEW Crochet Amigurumi Patterns For Beginners
I hope you’ve enjoyed creating your own fun mini seahorse using this free, no-sew seahorse crochet pattern! Amigurumi have become my life – and I’m sure they’ll quickly become your favourite hobby too!
Thank you so much for joining us! I hope you loved completing your Jelly Bean Seahorse as much as I enjoyed designing it. Don’t want to miss a stitch? Subscribe to the Darling Maple Designs newsletter and I’ll send updates for new pattern releases, sales and promotions straight to your inbox. See you again soon! Sara <3
If you have any questions or concerns with this, or any other pattern written by Darling Maple Designs, please do not hesitate to contact me at: info@darlingmapledesigns.com.
Don’t forget to Pin it to your project board.


