
Learn how to make your own cute NO SEW Jelly Bean Goldfish amigurumi, with this quick, step-by-step crochet Goldfish pattern!
Crochet this adorable little goldfish! It’s perfect for anyone on your gift list, especially someone with a goldfish or koi as a pet. At just over 3.5 inches and crocheted in under 1 hour, it makes it a fantastic last-minute gift! Plus, with the handy no-sew construction, you can create a mini goldfish plush without the stress of sewing pieces together.
Wondering What To Do With A Crochet Fish?
Of course, as a Mama, amigurumi designer and stuffed animal crocheter, I’ve got a whole ocean of ideas for you!
- Soft and cuddly crochet fish make perfect toys for children, encouraging imaginative play and a love for the ocean.
- Attach a small ring to your finished fish and transform it into a unique keychain.
- Use them as decorative elements to display on desks or shelves, as Christmas tree ornaments, or make a whole school to create a mobile!
- Crochet fish can provide a fun and educational tool for children. Use them to spark conversations about different marine life and their unique characteristics.
- There’s nothing more special than a handmade gift! Crochet a personalized fish for a friend or family member, a thoughtful token they’ll cherish.
- This free pattern can be made with scrap yarn, and is quick enough to add to your market stall or craft table!
There’s so many playful options for this little fish softie to swim into your life.
The Jelly Bean Goldfish amigurumi is shown using Hobbii Honey Bunny (similar to Premier Parfait Chunky), (light super bulky (6)).
Feel free to experiment with your favourite Amigurumi yarns as well! Check out this post for some guidelines on how.
This crochet goldfish pattern also includes a Full Video Tutorial!
Don’t want to wait for the rest of the Jelly Bean Sea Creatures to be released on the blog?!
The rest of the Jelly Bean Ocean Animal Collection, will be making their appearance on the blog over the next couple months. In the meantime, if you’re wanting to get started the Jelly Bean Sea Creature 7 Crochet Pattern Bundle is ready to go!
All this cuteness is available NOW, in the Jelly Bean Sea Creature 7 Crochet Pattern Bundle! This crochet pattern collection includes instructions to create the Sea Turtle, Octopus, Seahorse, Squid, Angelfish, Goldfish, and Crab!

Goldfish Breeds and Colour Inspiration
Get creative! Did you know there’s a whole world of goldfish breeds out there, each with unique characteristics? From the flowing fins of the Fantail to the majestic crown of the Oranda, these finned friends offer endless inspiration for your crochet goldfish. Imagine replicating the vibrant orange of a Comet goldfish or the contrasting black and white markings of a Panda Moor. The possibilities are truly swimming with colour!
Want to stay up to date on all the Darling Maple Designs happenings? Be sure to subscribe to my newsletter ![]()
Thank you so much for being here and crocheting with me ![]()
Please share your work by tagging me on FB or IG @darlingmapledesigns or use #darlingmapledesigns for a chance to have your work featured in my IG stories! ![]() Sara
Sara

Interested in more cute crochet patterns? Check these out!
The Premium PDF version of this pattern in now available and includes a convenient printable format, plus lots additional photos.
What you will need to make your No Sew Jelly Bean Goldfish Crochet Pattern
[A detailed, step-by-step pattern with both written instructions and easy to follow video tutorial]
Materials:
Hook size 5.0 mm (H)
Yarn – Hobbii Honey Bunny
| Yarn – Light Super Bulky (6)- Hobbii Honey Bunny or Premier Parfait Chunky | ||
| Main Colour: Peach | 15 yards | |
| Optional Accent Colours: White medium worsted weight | small amount | |
- Polyester filling – small amount
- 2 – 10mm black safety eyes (not suitable for children under 3): See video for embroidering eyes as an alternative.
- Stitch Markers or Safety pins to help with sewing placement
- Yarn needle to weave in the ends
Gauge: 4 Rounds of Gauge Pattern = 2.0 inch diameter
Gauge Pattern: Create a Magic Ring
Round 1: 6sc in the ring (6)
Round 2: 2sc in each st (12)
Round 3: *sc, 2sc* 6 times (18)
Round 4: *sc in the next 2 sts, 2sc* 6 times (24)

All of these Materials can be found in my Amazon Storefront shops
Abbreviations:
| ch | chain |
| dc | double crochet |
| hdc | half double crochet |
| sc | single crochet |
| scdec | single crochet decrease |
| ss | slip stitch |
| st(s) | stich(es) |
| *to* | repeat the sequence between the ** the number of times indicated |
| YO | Yarn Over |
Special Stitches & Techniques:
Full Video Tutorial
Magic ring
Lining Up the Tail
Lining Up the Dorsal Fin
Adding Eye Highlights
Embroider Eyes
Notes:
- #sc, eg. (2sc, 3sc, etc) shows the number of scs to be completed in the indicated st
- Sts listed between brackets are all worked in the same st, eg. (hdc, dc)
- I highly recommend using a stitch marker to help keep track of the rounds for the body/head
Recommended Sequence: It is highly recommended to complete the Jelly Bean Goldfish in the order written.
Start your Jelly Bean Goldfish Crochet Pattern:
Head/Body:
The head and body are worked in one piece from front to back in continuous rounds.
Using Main Colour, create a Magic Ring
Round 1: 6sc in the ring (6)
Round 2: *sc, 2sc* 3 times (9)
Round 3: *sc in the next 2 sts, 2sc* 3 times (12)
Round 4: *sc, 2sc* 6 times (18)
Round 5: sc in each st (18)
Note: In Round 6, FLO refers to the next stitch only in Round 6, all instructions within brackets ( ) are to be worked in the same front loop.
Round 6:
| sc in the next 5 sts, FLO (ss, ch1, 2dc, ch1, ss), sc in the next 5 sts, FLO (ss, ch1, 2dc, ch1, ss), sc in the last 6 sts (mark the last st of the round to show top/dorsal portion of fish) (16 + 2 BLO sts) | |
 | |
| Note: BLO mentioned in Round 7 are the BLO from Round 5 (left open from crocheting FLO in Round 6) Round 7: sc in the next 5 sts, sc in the BLO, sc in the next 5 sts, sc in the BLO, sc in the next 6 sts (18) Adding Eyes: If using safety eyes, place on Round 4 of the head (1 stitch up and 1 round in from each fin), approx 6-7 sts apart. | |
 |
Rounds 8-9: sc in each st (18)
Begin stuffing
Round 10: *sc in the next 4 sts, scdec* 3 times (15)
Round 11: *sc in the next 3 sts, scdec* 3 times (12)
Finish stuffing
Round 12: *scdec* 6 times (6)
Row 13 (crocheting the tail):
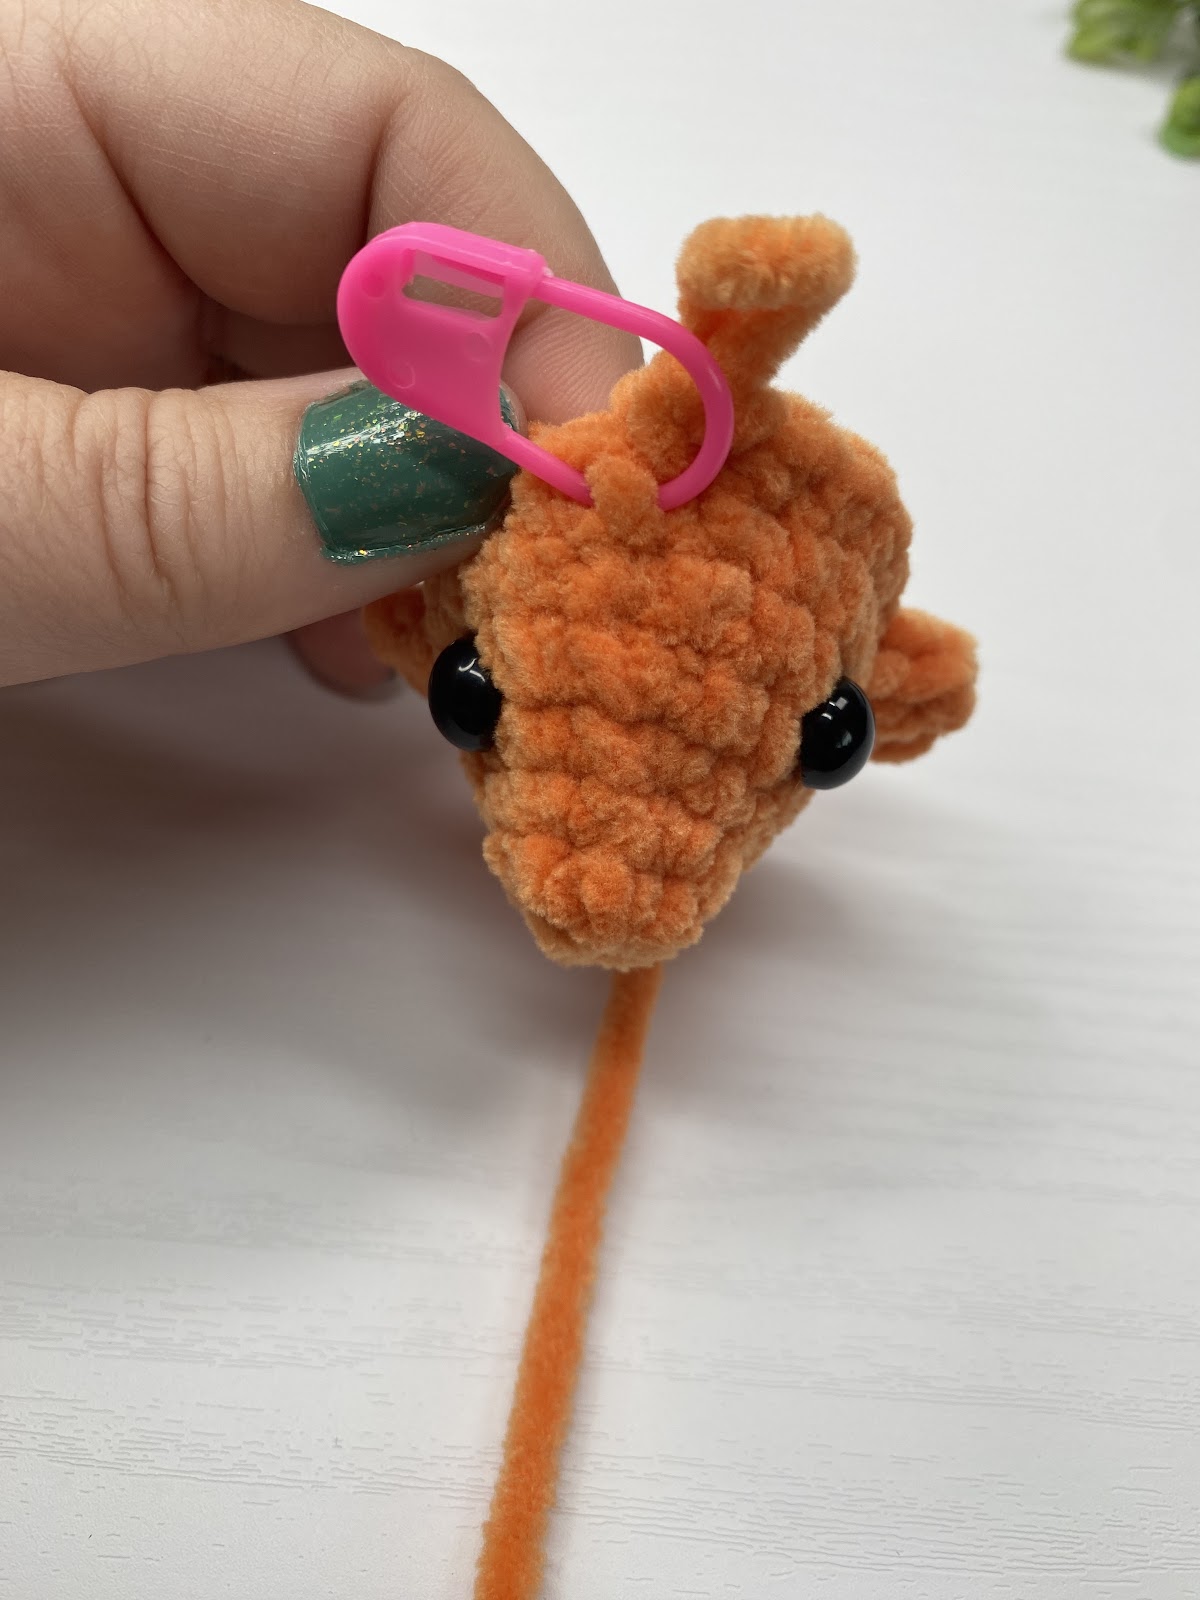
| Lining up the tail. Place the animal down on a hard surface with the marked st on the right hand side (left if left handed) and the head facing you. Locate and mark the stitch furthest to the right (if this is not the next unworked st then crochet over to this st, these extra sts will not count as the beginning of this round). (If left handed you will locate the stitch furthest to the left). Flatten and work both sides together beginning with the marked st (and last sc worked). (ss, ch1, hdc, 2dc, hdc, ch1), sc, (ch1, hdc, 2dc, hdc, ch1, ss) End off, weave in the end. | 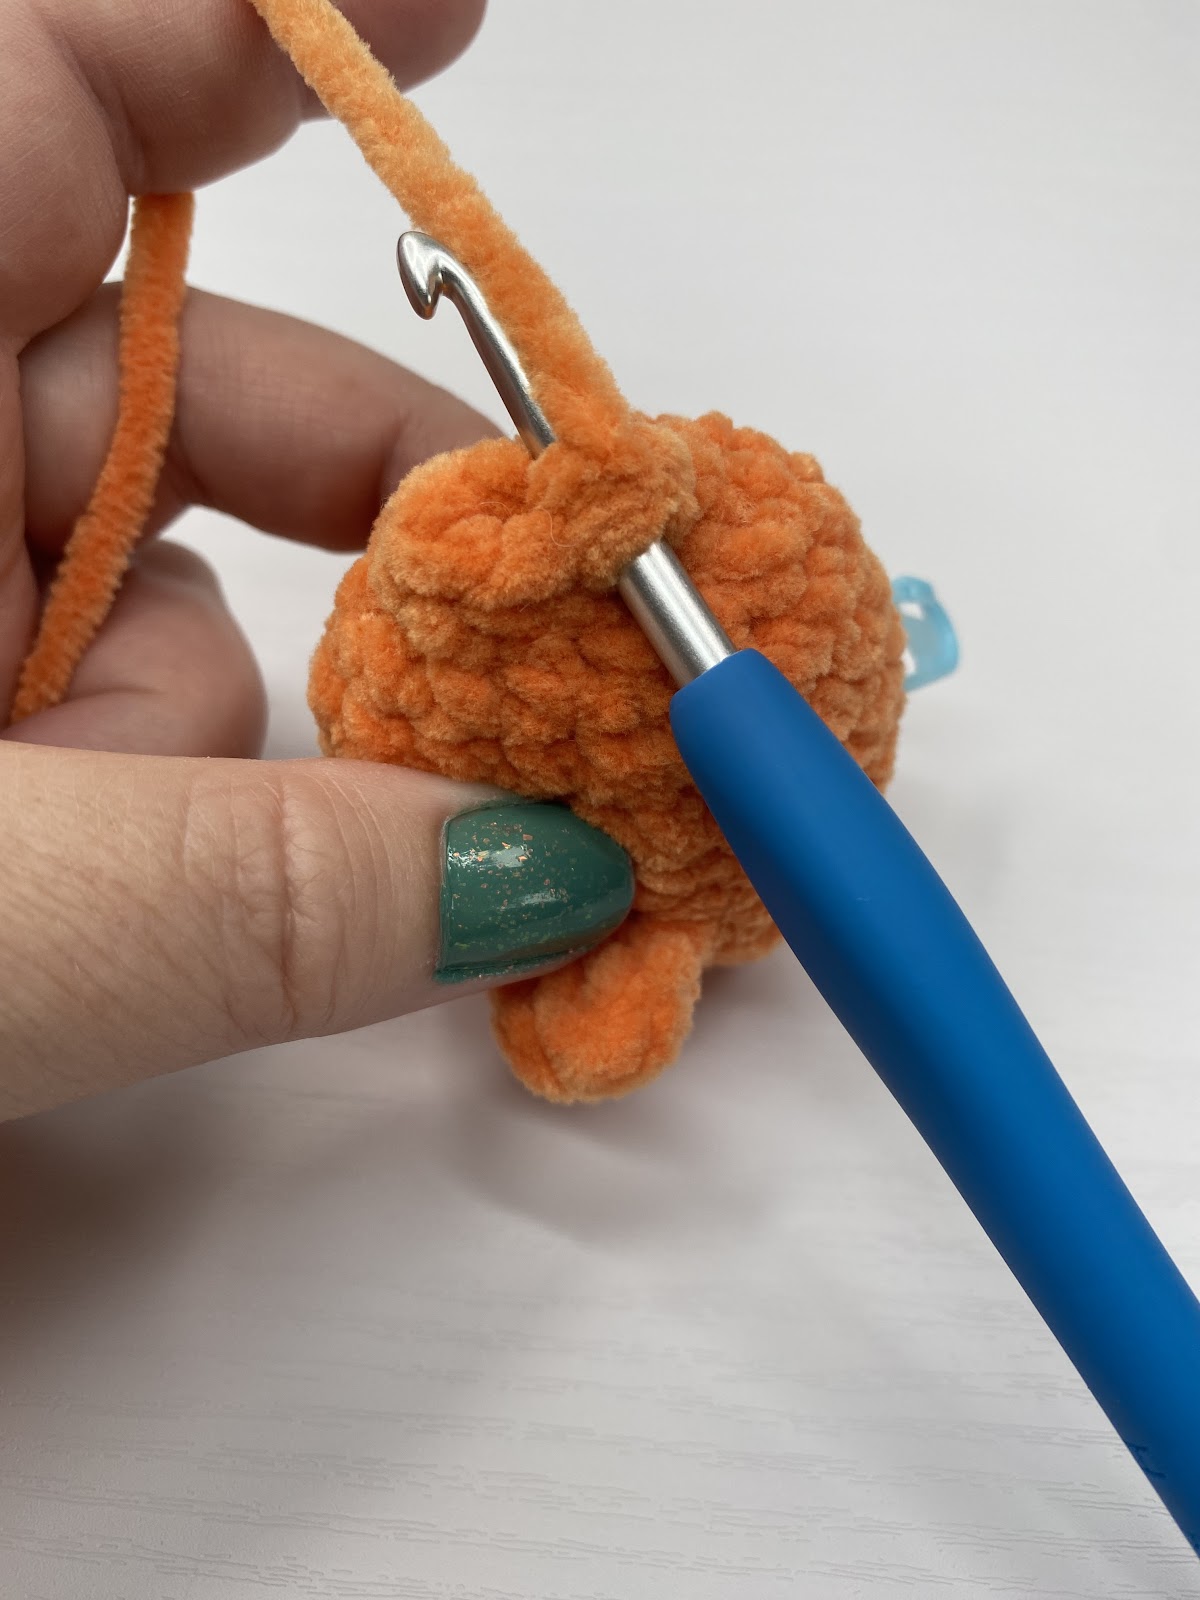 |
Dorsal Fin:
The Dorsal fin is worked along the top/centre of the fish.
Using Main Colour, place fish with the head facing to the right (left if left handed) working along top centre of the fish, attach yarn with a ss 2 rounds to the right (left if left handed) (Round 4) of the marked stitch from Round 6.
Row 1: 5dc in the marked st from Round 6 of the head, sk next round of the head, ss to the centre st 2 rounds to the left (right if left handed) (Round 8) on the head (5 + 2ss)
End off, weave in ends.
Sewing Placement –
| Eye Details: Follow video for optional eye detail. Video |  |
Congratulations!
You have now completed your No Sew Jelly Bean Goldfish Crochet Pattern.
Personalize Your Crochet Goldfish
If you want to go beyond a simple fish and customize your goldfish softie? There’s so many things you could try.
- Imagine adding a touch of realism with tiny embroidered scales. Although they really would have to be tiny!
- Use a yarn with shimmering threads, to create dazzling fins that seem to shimmer in the sunlight.
- Embroider a winking eye on one side and open eye on the other !
These little details will transform your goldfish into one with extra personality!
Discover my embroidered sleepy eye tutorial.
We love seeing your finished projects. Tag us in your photos and posts using #DarlingMapleDesigns or @DarlingMapledesigns.
That’s it! Now you’ve got your very own Jelly Bean Goldfish amigurumi, swimming with personality and ready to make a splash! This free crochet goldfish pattern is the perfect project to make a fun little fish, playful keyring for your bag, or a cute gift for someone with a pet goldfish!
The best part? This no-sew amigurumi construction makes it a breeze to create, letting you skip the fiddly sewing steps and focus on the pure joy of crafting your own plush goldfish!
Thank you so much for joining us! I hope you loved completing your Jelly Bean Goldfish as much as I enjoyed designing it. Don’t want to miss a stitch? Subscribe to the Darling Maple Designs newsletter and I’ll send updates for new pattern releases, sales and promotions straight to your inbox. See you again soon! Sara <3
If you have any questions or concerns with this, or any other pattern written by Darling Maple Designs, please do not hesitate to contact me at: info@darlingmapledesigns.com.
Don’t forget to Pin it to your project board.


